24hr Sourdough
This is my low-touch recipe for making fresh bread while working from home. Although the total process takes 24hrs, or a touch more, the total amount of “work” is only about 60mins spread over the total time. The ingredient weights below are easy to remember and will make two loaves big enough to feed 4 hungry people each, and making two together batches the work. We will normally eat one loaf fresh and freeze the other. It freezes and defrosts really well - take it out the freezer in the morning and it will be ready for lunch and doesn’t lose much of its crunch and spring.
The recipe can easily halved to make a single loaf.
I currently buy my flour online from Shipton Mill. I particularly like the Type 55 French white flour for making both this sourdough and baguettes and as a general plain flour in the kitchen.
Ingredients
| Ingredient | Bakers Percentage | |
|---|---|---|
| 900g | French Type 55 White Bread Flour | 90 % |
| 100g | Type 997 Light Rye Flour | 10 % |
| 650g | Water | 65 % |
| 85g | 100% Hydration Starter | 8.5 % |
| 15g | Salt | 1.5 % |
| Gluten free flour for dusting | ||
Method
The night before take the starter out the fridge and feed with 30g flour and 30g water. Leave it on the kitchen counter. When you come back in the morning it should have risen and be full of bubbles. If you don’t make often you might need to repeat this for a couple nights before baking.


Around 10am put the water (lukewarm if possible) into a bowl first, then add the starter followed by the flour and salt. Adding the water first helps avoid dry flour sticking to the bowl and remaining as dry lumps in the dough. Use a wooden spoon or your hand to combine all the ingredients until no flour remains dry. It should be a shaggy mess but there’s no need to remove from the bowl or knead the dough. Cover and leave for 30mins.

Every 30mins for the next two hours: with a wet hand perform a “stretch-and-fold”. Grab one side of the dough and stretch it up and out the bowl. Fold it back down into the bowl. Rotate 90° and repeat. Tuck the dough into a ball and re-cover.
After 4-5 repeats of stretch-and-fold the dough should now be smooth and elastic. When stretching out the bowl you should be able to stretch thin enough to see light through the dough without it tearing, the “window pane” test. If the dough breaks you can repeat another round of stretch-and-fold.

About lunchtime you should have well developed dough. You can now leave it to prove. Leave it on the kitchen countertop to rise. It should rise by about 30-50% through the afternoon but more is ok too. If it is a warm day it will rise more and large bubbles will form on the surface.
Around 7pm its time to shape the loaves. A dough scraper is a great tool for the next few steps. Tip the sticky dough out onto a kitchen worktop. If you’re making more than one loaf now cut the dough into equal parts. Using a dough scraper or similar tool “pre-shape” the cut dough into a smooth ball by putting the scraper behind the dough and drag towards you, using the stickiness of the kitchen surface to form a tight skin on the ball. Leave to rest for about 20mins.
Around 7:30pm prepare the banneton by dusting liberally with gluten-free flour and a light dusting on the worktop. Scoop the dough ball up using the dough scraper and flip onto the dusted worktop so that the side that was facing down onto the worktop when resting is now facing up. Stretch the dough north, south, east and west and then fold east and west into the middle like an envelope. Then roll from south to north, pulling towards you as you do to tighten the surface of the bread. Finish by squashing the seam shut and then transfer to the banneton with the seam facing upwards. Place the banneton inside a large plastic bag and cinch closed with a klip-it.
Around 9pm transfer the bags to the fridge and leave overnight.
The next morning put a large cast iron casserole dish, with lid, into the oven and turn up to 250°C and preheat until up to temperature (normally about 30mins). Once up to temperature cut a square of baking paper a little wider than the pot. You will use the baking paper to lower the loaf into the pan so it needs to be wide enough to work as handles, but not so wide that it gets in the way of cooking.


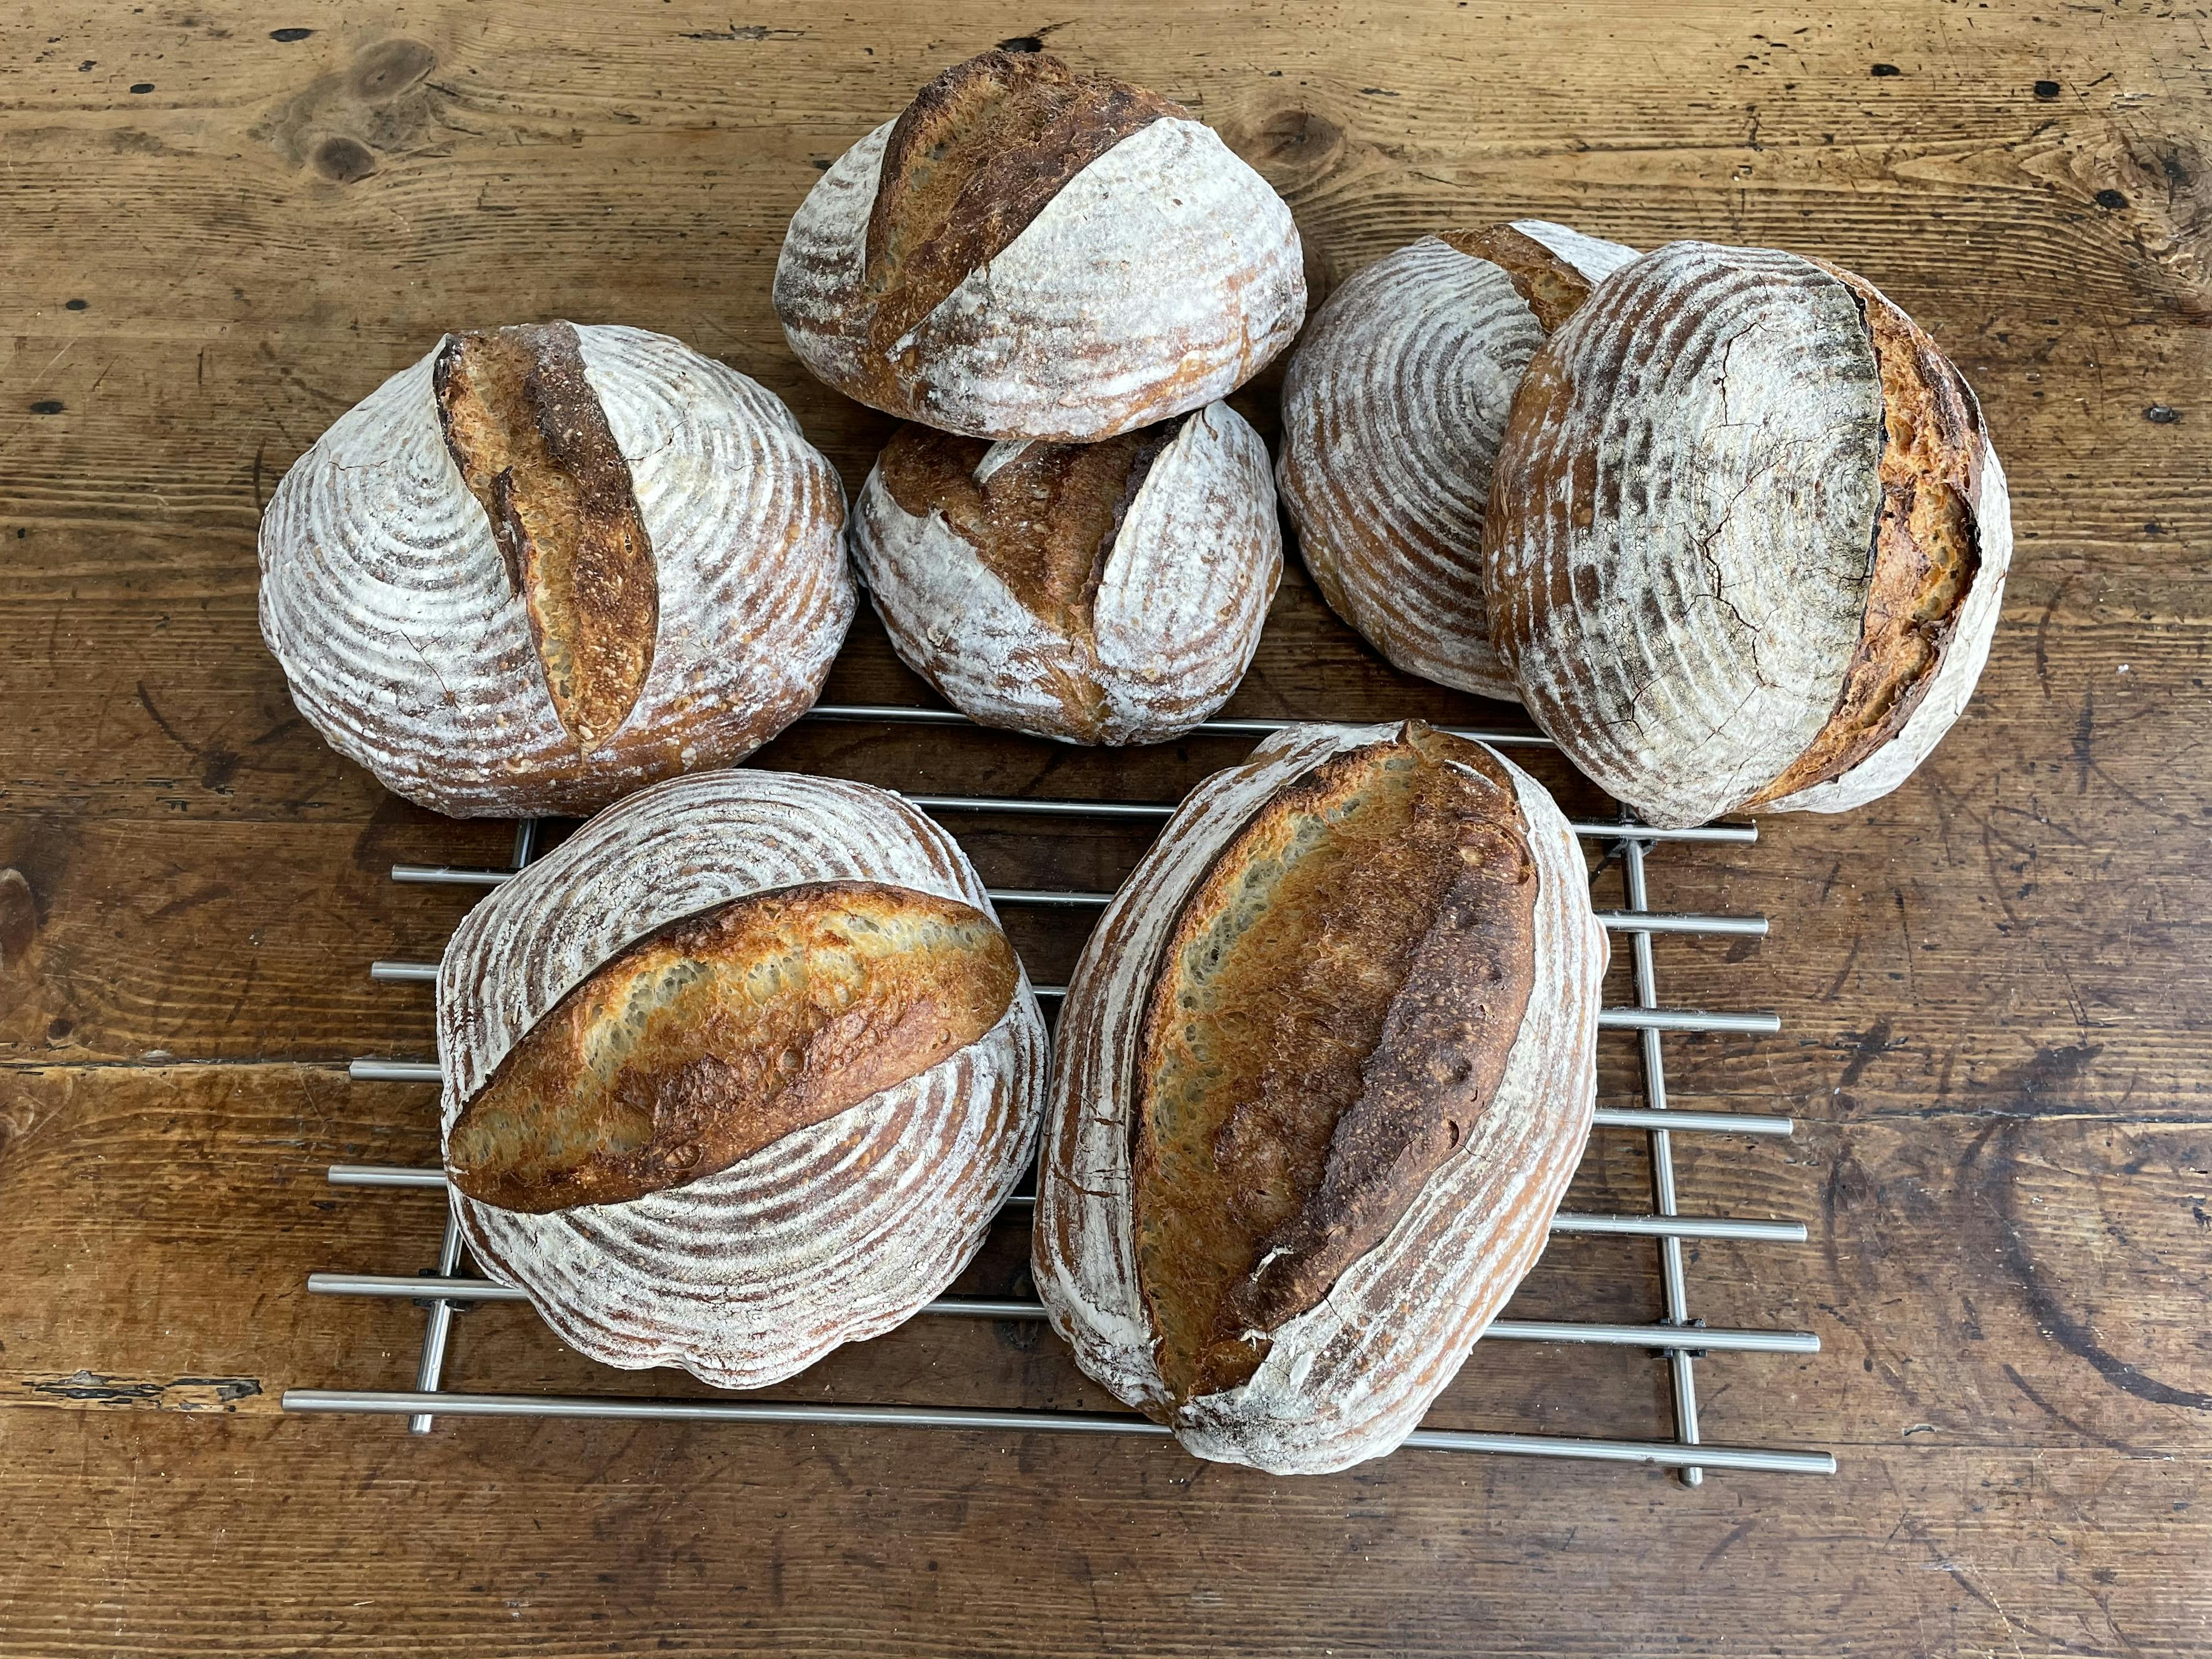
Take a loaf out of the fridge and turn out of the banneton onto the baking paper so that the seam again now faces down onto the sheet. Remove the banneton. With a very sharp knife, ideally a razor-blade, score the top of the dough. This will allow it to “spring” in the oven an create the ear of the loaf. Take the hot pan out of the oven and very carefully lift the bread using the baking paper, and lower it into the hot pan. Put the lid on and put in the oven at 250°C for 23 minutes. Cooking in the hot pan with the lid on will use the steam released from the dough as it cooks to form a shiny crust. After 23 minutes remove the lid, turn the oven down to 200°C, and cook for a further 25 minutes. After the total 48 minutes take the bread out the pan and transfer to a wire rack to cool. It should have a deep amber crust and smell fantastic. It will crackle slightly as it cools on the rack.
If you are making two loaves, turn the oven back up to 250°C and return the pot and lid to heat up again. Repeat the process with the second loaf.
Lunchtime with fresh bread. While it’s tempting to cut into the loaf immediately after it comes out the oven, resist! The bread continues to cook inside for a little while after coming out the oven. Leave for about an hour if possible, it will be the perfect temperature to eat with butter, and should have a springy internal crumb.
Feeding a starter
I keep my starter in a sealed container in the fridge most of the time, taking it out and feeding a couple of days before using it. It keeps well in the fridge only needing a feed once a week. If left for several weeks without using/feeding it begins to give off an acetone smell which can contaminate other things in the fridge, especially dairy like butter or yogurt. If this happens the starter can still be rescued, throw most away and take a small amount (ca. 10g) and restart the feeding process with that until you’ve worked back up to a full stock.
To feed the starter mix 25g of flour1 and 25g of water into the existing starter to maintain a 100% hydration ratio. Leave overnight and it should be bubbly and active in the morning. If it’s been a couple of weeks since you last baked it might not be active enough from one feed - repeat the process for a second night. On the day of making, when you’ve taken what you need for the dough, feed once more and return the starter to the fridge.
I try to only keep a small amount of starter at any time, maybe around 100g. Feeding by adding 50g of flour+water a time, and taking 85g when baking with it, means that there is very little waste excess starter. If I am running low I will give it an additional or larger feed. The only time I ever really need to discard is when it has gone a bit stale and smells bad (see above). When this happens I might do several feeds and discard the majority to return it to a healthy state.
I keep my starter at 100% hydration - that is equal parts flour and water by weight. If it gets a bit runny or a bit dry, you can always adjust the feeds slightly to get it back to a consistency that works for you. I know bakers who will keep their starter as low as 50% hydration (50g water for every 100g flour). This part of the process sounds much more complicated/ technical than it is - use your senses to decide what is best!
I keep a small tub of a 50/50 mix of rye and white for this, the starter seems to like the rye ↩︎